

Getting Started with Pixtel — First 10 Minutes
Introduction
You've just installed Pixtel — now what?
In 10 minutes or less, you'll go from a fresh install to capturing, annotating, and sharing your first screenshot. This guide walks you through everything you need to know to hit the ground running.
Let's get started.
What is Pixtel?
Pixtel is a Windows screen capture and annotation application that lets you capture screenshots, record your screen, annotate images, and share or export your work — all without switching between tools.
Everything lives in one place: capture, edit, organise, and share.
Step 1: Launch Pixtel and Explore the Home Bar
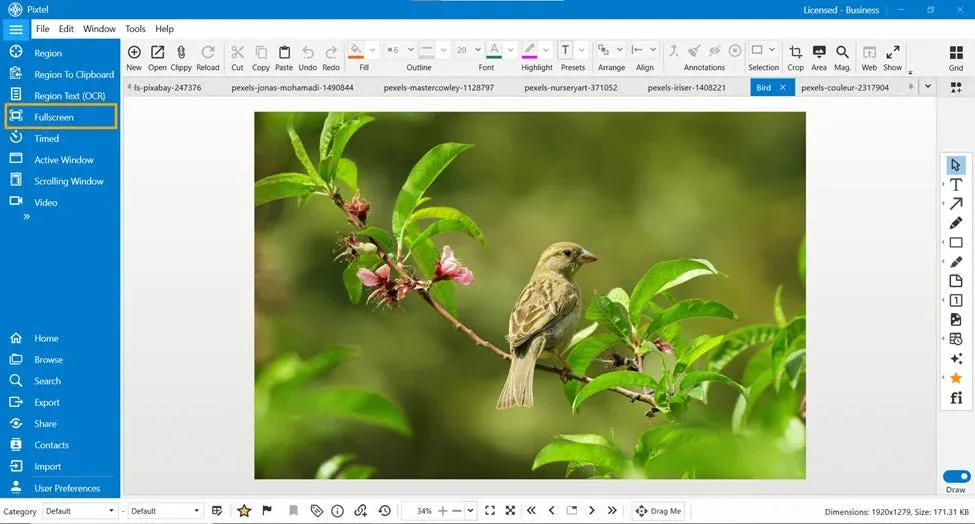
When you open Pixtel for the first time, the Home Bar is your command centre. It displays all available capture modes at a glance.
You'll see options including:
- Region — capture a custom area of your screen
- Fullscreen — capture your entire display
- Active Window — capture only the app window you're working in
- Scrolling Window — capture a long webpage or document as one image
- Region to Clipboard — capture directly to clipboard without saving
- Timed — set a countdown before capturing
- Video — record your screen or camera
Click the arrow icon on the Home Bar to expand and see every available mode.
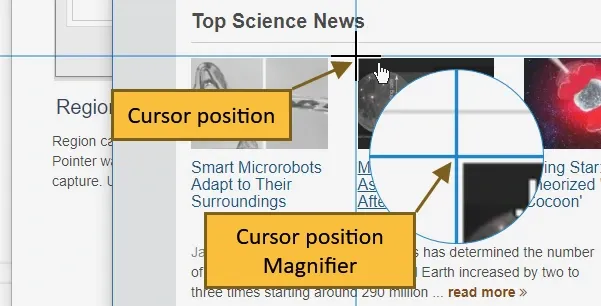
Step 2: Take Your First Screenshot
The fastest way to get started is a Region Capture.
- Click Region on the Home Bar (or press your shortcut key — default is Ctrl + PrtScr).
- Your screen dims and a crosshair cursor appears.
- Click and drag to select the area you want to capture.
- Release the mouse — your screenshot opens instantly in a new Pixtel tab.
That's it. Your first capture is done.
Tip: You can also access all capture modes from the System Tray (taskbar icon) even when Pixtel is minimised — so you never have to interrupt your workflow to take a screenshot.
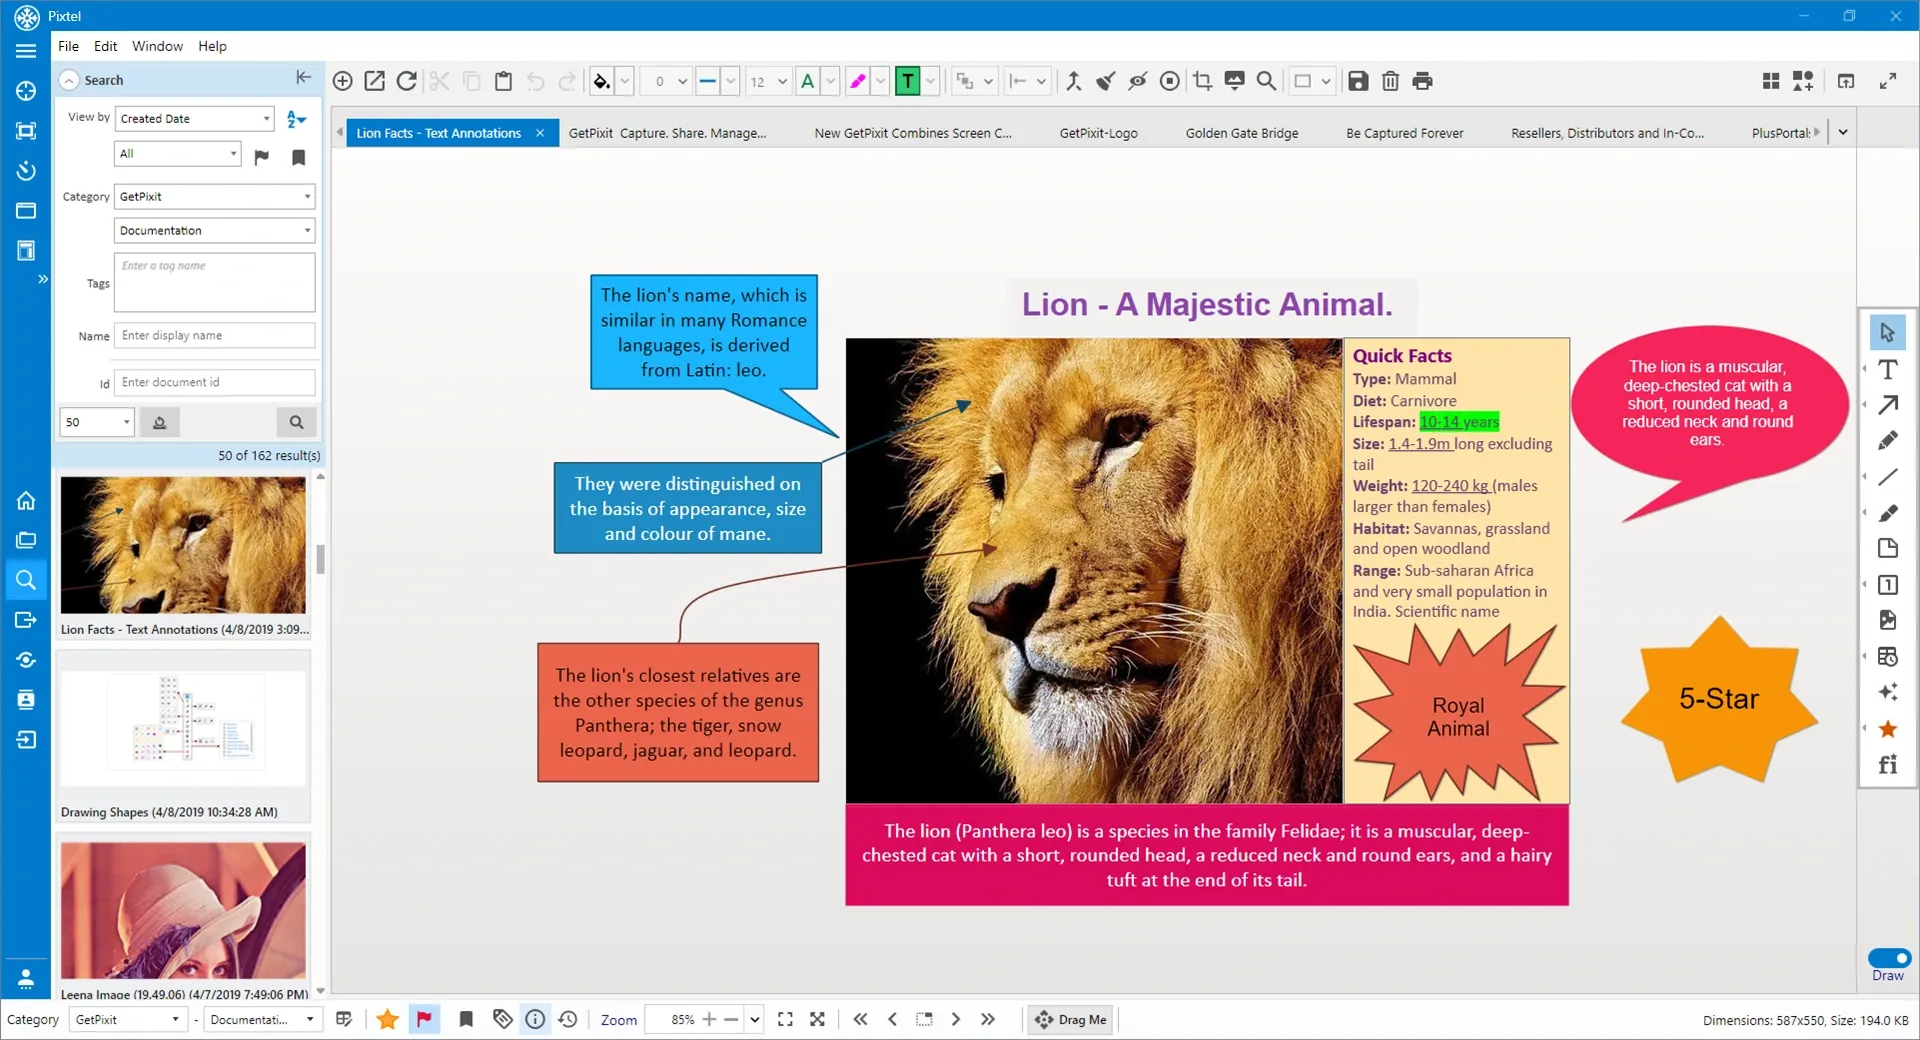
Step 3: Annotate Your Screenshot
Once your screenshot opens in a tab, you're in Draw Mode — ready to annotate immediately.
The most commonly used tools are:
- Arrow — point to something important
- Text Box — add labels or explanations
- Rectangle Highlight — draw attention to a specific area
- Callout — add a speech-bubble style annotation
- Blur — hide sensitive information
- Sticky Note — add a quick reminder or comment
Click any tool from the toolbar, then click or drag on your image to apply it.
To undo any change, press Ctrl + Z.
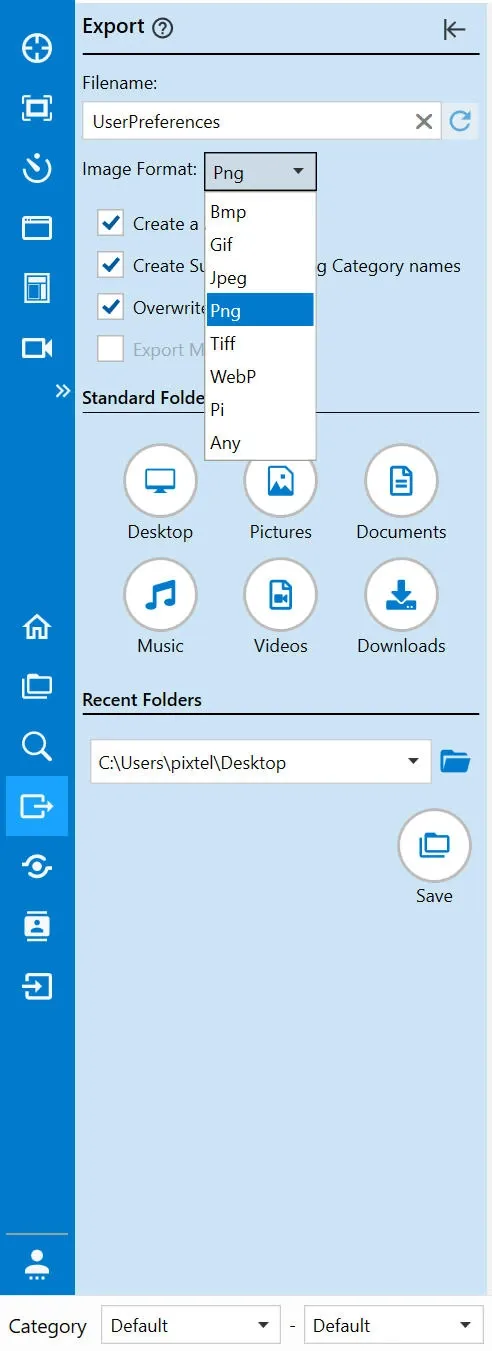
Step 4: Save or Export Your Screenshot
When you're happy with your annotated screenshot, you have several options:
- Save — press Ctrl + S to save to your Pixtel library
- Export to folder — go to Export panel by clicking on the left bar Export icon to save as PNG, JPEG, BMP, WebP, or other formats
- Copy to clipboard — press Ctrl + C to paste directly into an email, chat, or document
- Drag Me — drag the image directly from Pixtel into any app without saving first
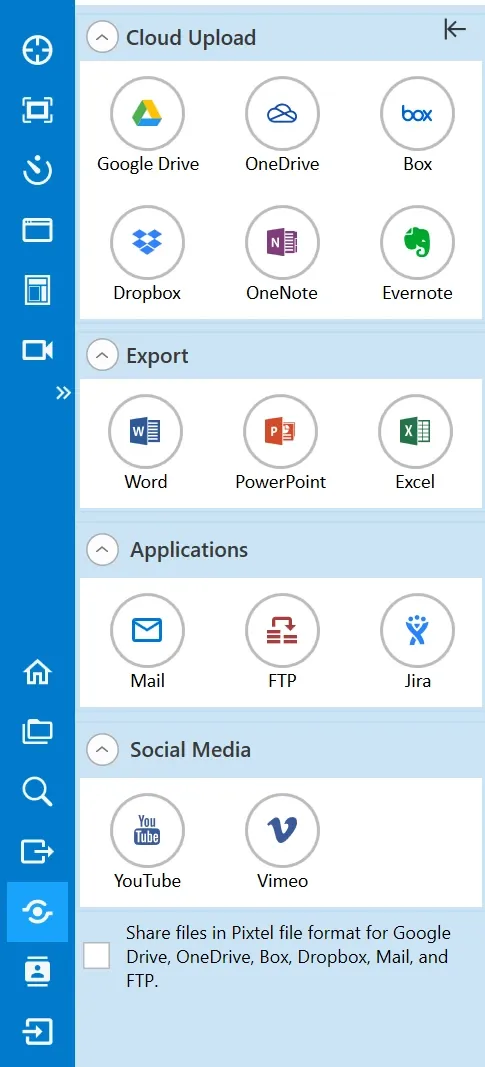
Step 5: Share Your Screenshot
Pixtel connects directly to the tools your team already uses. From the Home Bar → Share, you can upload or send your screenshot to:
- Jira — attach annotated screenshots directly to issues
- Google Drive, OneDrive, Dropbox, Box — upload to cloud storage
- Email — send via your configured email account
- OneNote / Evernote — clip directly into your notes
- YouTube / Vimeo — publish screen recordings instantly
- FTP — upload to your server
For a quick share, use Share Link — Pixtel generates a link you can copy and send to anyone.
Step 6: Set Up Your Keyboard Shortcuts
Pixtel works best when you never have to open the app just to capture. Set up shortcuts to trigger any capture mode from anywhere on your computer.
- Go to User Preferences → Shortcuts.
- Click the shortcut field next to the capture mode you want.
- Press your preferred key combination.
- Click OK to save.
Recommended shortcuts to set up first:
| Capture Mode | Suggested Shortcut |
|---|---|
| Region Capture | Ctrl + PrtScr |
| Fullscreen Capture | PrtScr |
| Scrolling Window | Shift + PrtScr |
| Region to Clipboard | Ctrl + Shift + A |
| Active Window Recording | Alt + D |

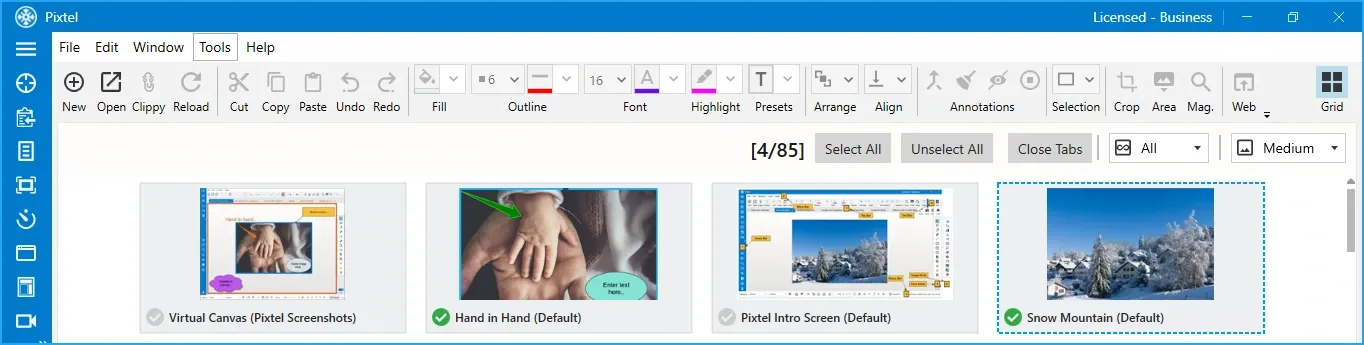
Step 7: Browse and Manage Your Captures
All your screenshots, recordings, and imported files are organised in the Browse view.
- Click Browse on the Left Bar to browse images by created and updated dates in one place.
- Use the Grid View to see thumbnails of all your captures.
- Filter by type — images, videos, or audio.
- Bulk select captures to export, collage, tag, or delete in one action.
Nothing gets lost — every capture is stored and searchable inside Pixtel.
You're Ready
In just a few minutes you've learned how to:
✔ Navigate the Home Bar and understand capture modes
✔ Take your first region screenshot
✔ Annotate with arrows, text, highlights, and callouts
✔ Save, export, and copy your captures
✔ Share directly to Jira, cloud drives, and more
✔ Set up keyboard shortcuts for faster capturing
✔ Browse and manage your media library
Pixtel is built to become invisible in your workflow — fast to trigger, powerful when you need it, and always organised.
✨ Capture once. Use it forever. It isn't just a tool — it's Pixtel.
What to Explore Next
- 4 Easy Ways to Capture Screenshots in Pixtel →
- How to Annotate Images in Pixtel →
- How to Record Your Screen Effortlessly with Pixtel →
- Jira Integration with Pixtel →
- Customize Your Workflow with Pixtel User Preferences →
👉 Download Pixtel
🎥 Follow us on YouTube
📘 Read Detailed Documentation
'%3e%3cpath%20d='M6.49988%200.862305L0.380969%206.98121C-0.127315%207.4895%20-0.127315%208.31107%200.380969%208.81936C0.889253%209.32764%201.71083%209.32764%202.21911%208.81936L5.19992%205.83855V15.7C5.19992%2016.4176%205.781%2017%206.49988%2017C7.21875%2017%207.79984%2016.4176%207.79984%2015.7V5.83855L10.7806%208.81936C11.0341%209.07285%2011.3669%209.20024%2011.6997%209.20024C12.0325%209.20024%2012.3653%209.07285%2012.6188%208.81936C13.1271%208.31107%2013.1271%207.4895%2012.6188%206.98121L6.49988%200.862305Z'%20fill='white'/%3e%3c/g%3e%3cdefs%3e%3cclipPath%20id='clip0_1_2'%3e%3crect%20width='13.0002'%20height='16.8995'%20fill='white'%20transform='translate(-0.000244141%200.100533)'/%3e%3c/clipPath%3e%3c/defs%3e%3c/svg%3e)