

How to Annotate Images in Pixtel: Mark Up, Highlight, and Communicate Like a Pro
Pixtel's annotation toolkit covers everything from basic arrows and text boxes to vector icons, timestamps, and embedded images — all on a live canvas where every element stays editable after saving. This guide covers the full set of tools and how to configure defaults.
Watch the tutorial: https://www.youtube.com/embed/D29flQJ_61Y
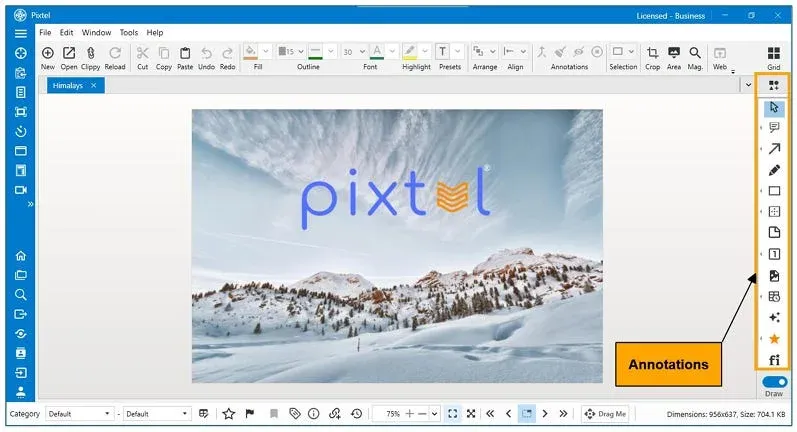
Accessing the Annotation Toolbar
- Open or capture an image in Pixtel — it opens in a new tab
- Switch to Draw Mode using the toggle on the right side panel
- The full Annotation Toolbar appears — select any tool to begin
Annotation Types
| Tool | Use |
|---|---|
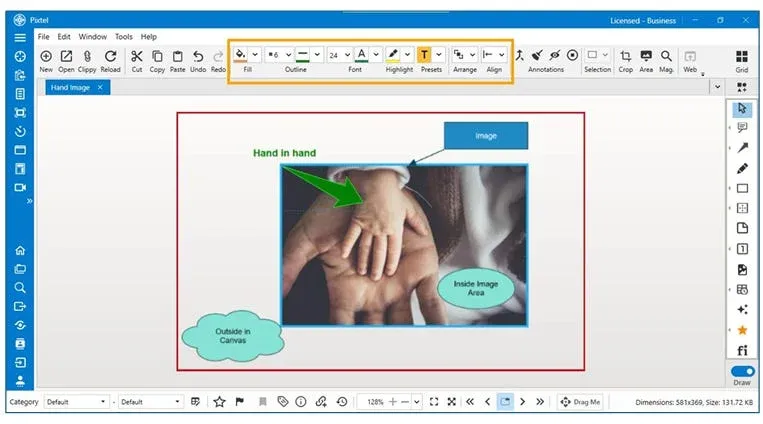
| Arrows & Lines | Point to elements, show flow or direction |
| Text Boxes | Add labels, captions, or inline notes |
| Callouts | Combine a pointer and a text bubble |
| Shapes | Rectangles, ellipses, polygons — for highlighting or masking |
| Sticky Notes | Off-canvas comments that don't clutter the image |
| Smart Geometries | Edge-snapping precision shapes for diagrams |
| Smart Pencil | Freehand drawing that auto-converts to clean shapes |
| Timestamps | Auto-insert current date/time |
| Links | Embed clickable URLs directly in the capture |
| Embedded Images | Drop a secondary image onto the canvas |
Styling & Customization
Every annotation is a live vector object — you can change it any time without re-capturing:
- Fill & stroke — adjust color, border thickness, and opacity per shape
- Fonts — resize, bold, italicize, or recolor text in any annotation
- Align & arrange — align objects left/center/right, or reorder front/back
- Vector icon library — 20,000+ icons searchable by keyword, drop directly onto canvas
- Clip-art — drag from the built-in library or from any web source
- Copy & paste annotations — duplicate styled elements across multiple images for consistency
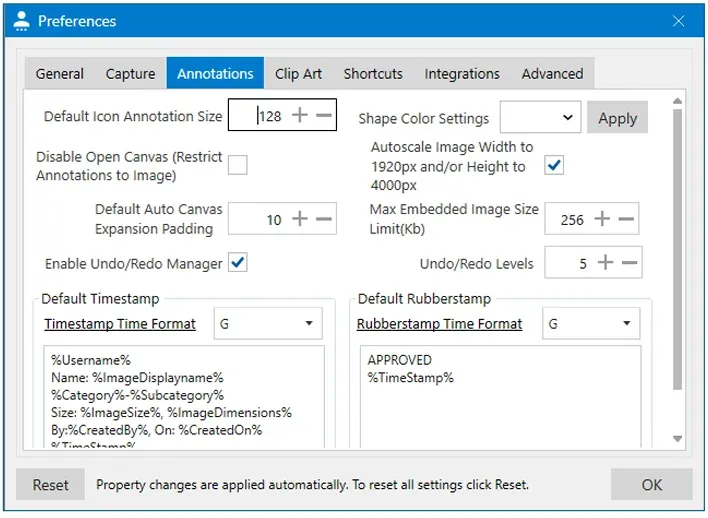
Annotation Preferences
Under User Preferences → Annotations, you can configure defaults that apply to every new annotation session:
- Default icon size — standard size for dropped icons
- Disable open canvas — keep annotations confined to image boundaries
- Auto canvas expansion — expand workspace automatically when annotations exceed the image edge
- Undo levels — control how many steps are retained (higher = more memory)
- Shape color presets — default colors for newly created shapes
- Auto scale width — auto-resize wide captures (e.g. 1920px) for easier sharing
- Max embedded image size — warn when large images may impact performance
- Default timestamp format — customize date/time format with dynamic variables
- Default rubberstamp — preset text and format for watermarks or approval stamps
Tips
Annotations are never flattened. Unlike most editors, Pixtel keeps every annotation as an independent vector layer. Open any saved canvas days or weeks later and reposition, recolor, or delete individual elements without touching the underlying screenshot.
Use the Virtual Canvas for overflow. If you need more annotation space than the image provides, the canvas expands automatically — annotate completely outside the image boundaries.
Related reading:
- Pixtel Callouts — Complete Guide →
- Clear Visual Communication with Pixtel Arrows →
- Flatten Annotations in Pixtel →
- Editing & Highlighting Images in Pixtel →
Capture once and use it forever. It isn't just a tool — it's Pixtel.
'%3e%3cpath%20d='M6.49988%200.862305L0.380969%206.98121C-0.127315%207.4895%20-0.127315%208.31107%200.380969%208.81936C0.889253%209.32764%201.71083%209.32764%202.21911%208.81936L5.19992%205.83855V15.7C5.19992%2016.4176%205.781%2017%206.49988%2017C7.21875%2017%207.79984%2016.4176%207.79984%2015.7V5.83855L10.7806%208.81936C11.0341%209.07285%2011.3669%209.20024%2011.6997%209.20024C12.0325%209.20024%2012.3653%209.07285%2012.6188%208.81936C13.1271%208.31107%2013.1271%207.4895%2012.6188%206.98121L6.49988%200.862305Z'%20fill='white'/%3e%3c/g%3e%3cdefs%3e%3cclipPath%20id='clip0_1_2'%3e%3crect%20width='13.0002'%20height='16.8995'%20fill='white'%20transform='translate(-0.000244141%200.100533)'/%3e%3c/clipPath%3e%3c/defs%3e%3c/svg%3e)