

4 Easy Ways to Capture Screenshots in Pixtel | Screen Capture Guide
Pixtel gives you four different entry points for starting a capture — useful depending on whether you're mid-workflow, working from another app, or setting up a repeating task. Here's how each one works.
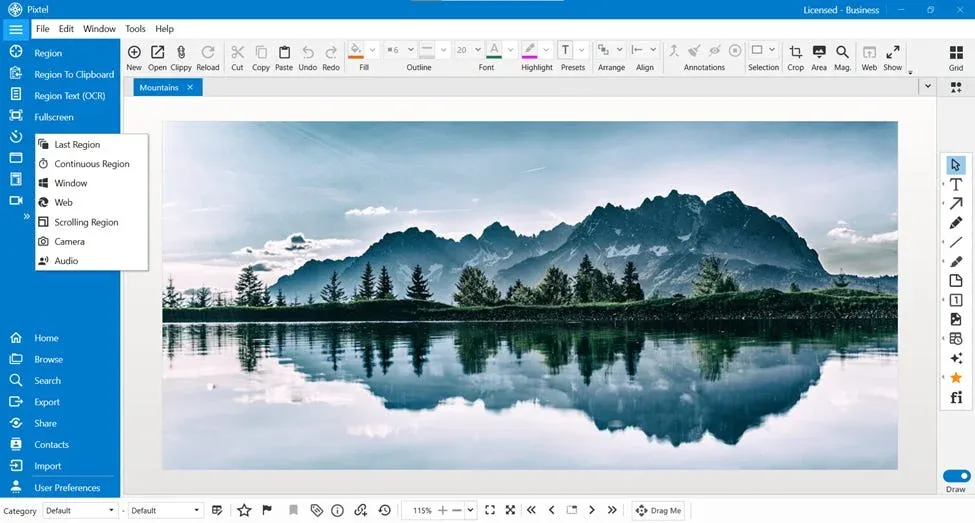
1. Home Bar
When Pixtel is open, the Home Bar shows the most common capture modes directly:
- Region
- Region to Clipboard
- Region Text (OCR)
- Full Screen
- Timed
- Active Window
- Scrolling Window
- Video
Click the arrow icon to expand the full list of all available modes.
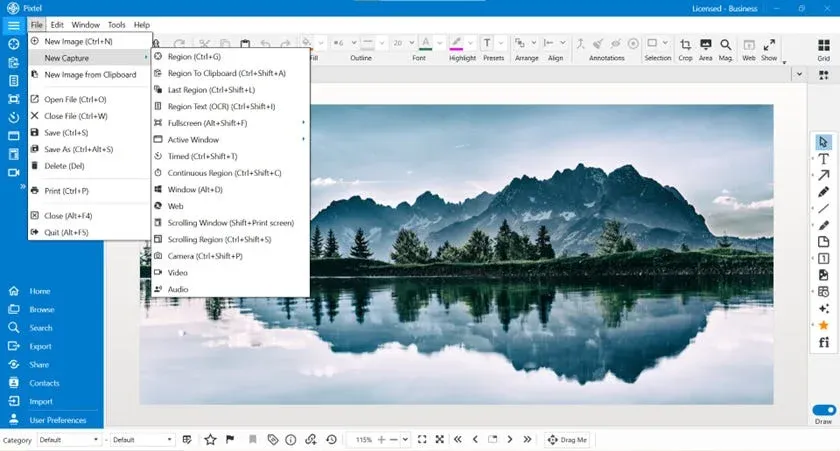
2. File Menu (File → New Capture)
If you're already working inside Pixtel:
- Click File in the top menu
- Select New Capture
- Choose your capture mode from the full list
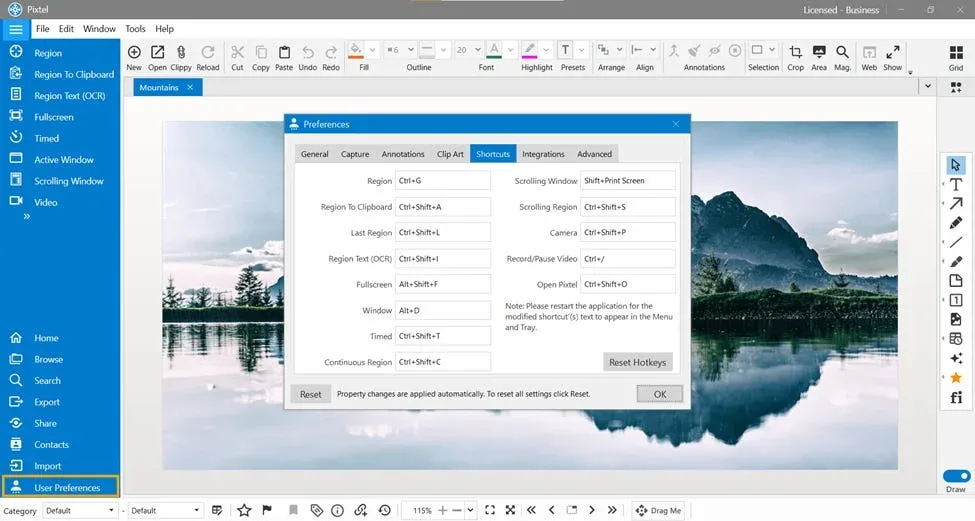
3. Keyboard Shortcuts
The fastest way to trigger a capture without touching the mouse. Shortcuts are customizable:
- Go to User Preferences → Shortcuts
- View all assigned capture shortcuts
- Click any shortcut to reassign it
- Click OK to save
Once set, you can trigger any capture mode without opening Pixtel at all.
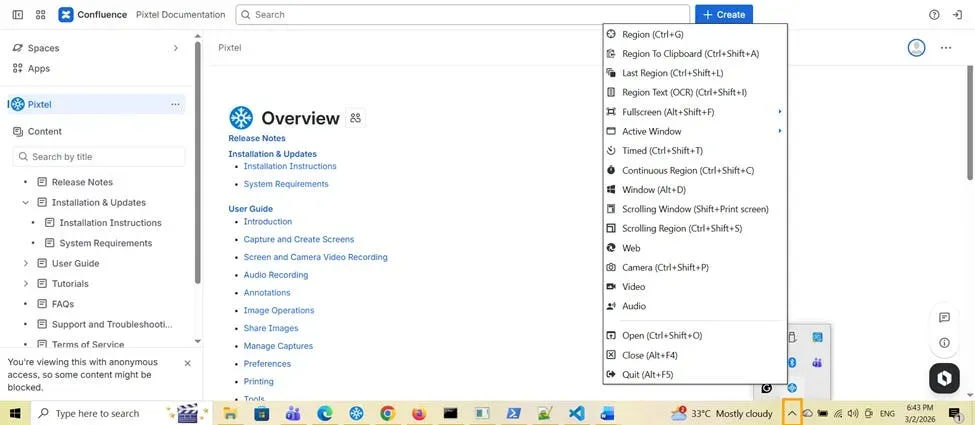
4. System Tray
Pixtel stays accessible from the taskbar even when minimized:
- Click the Pixtel icon in the system tray (bottom-right of the taskbar)
- All capture modes appear in the context menu
- Select the one you need
This is the best option when you're working in another application and need to grab a capture without switching windows.
After the Capture
Regardless of how you triggered it, the screenshot opens automatically in a new Pixtel tab where you can annotate, crop, highlight, export, or share — without saving to disk first.
Related reading:
- How to Customize Capture Options in Pixtel →
- Capture the Same Screen Area Instantly with Last Region →
- How to Capture Delayed Screenshots with Pixtel →
Capture once and use it forever. It isn't just a tool — it's Pixtel.
'%3e%3cpath%20d='M6.49988%200.862305L0.380969%206.98121C-0.127315%207.4895%20-0.127315%208.31107%200.380969%208.81936C0.889253%209.32764%201.71083%209.32764%202.21911%208.81936L5.19992%205.83855V15.7C5.19992%2016.4176%205.781%2017%206.49988%2017C7.21875%2017%207.79984%2016.4176%207.79984%2015.7V5.83855L10.7806%208.81936C11.0341%209.07285%2011.3669%209.20024%2011.6997%209.20024C12.0325%209.20024%2012.3653%209.07285%2012.6188%208.81936C13.1271%208.31107%2013.1271%207.4895%2012.6188%206.98121L6.49988%200.862305Z'%20fill='white'/%3e%3c/g%3e%3cdefs%3e%3cclipPath%20id='clip0_1_2'%3e%3crect%20width='13.0002'%20height='16.8995'%20fill='white'%20transform='translate(-0.000244141%200.100533)'/%3e%3c/clipPath%3e%3c/defs%3e%3c/svg%3e)