

Clear Visual Communication with Pixtel Arrows
Explaining things visually can often be more powerful than using words alone. Whether you’re guiding someone through a feature, pointing out an issue, or highlighting an important detail, clarity is everything. This is where Pixtel makes a real difference. With its simple annotation tools — especially arrows — you can turn any screenshot into a clear and effective visual explanation.
Uploading a Screenshot and Getting Started
To begin, you need an image to work with. Pixtel gives you flexible options:
- You can capture a screenshot directly using Pixtel
- Or upload an existing image using the available import options
Once your screenshot is selected, it opens in a new Pixtel tab, giving you a dedicated space to edit and annotate.
From here, switch to Draw Mode. This is where all the annotation tools become available. By toggling into draw mode, you unlock options to mark, highlight, and guide attention within your image.

Arrow Types in Pixtel
Pixtel provides three arrow styles, each designed for a slightly different purpose. Choosing the right one helps make your communication clearer.
1. Line Arrow This is the most minimal option. It’s clean, simple, and doesn’t overwhelm the image. Use it when you want to point something out subtly without adding too much visual weight.
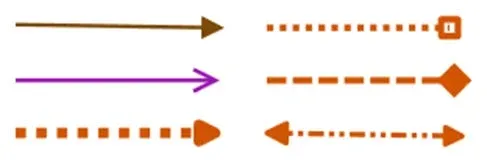
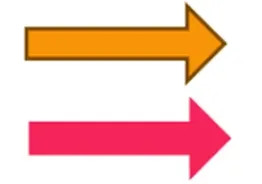
2. Arrow This is the standard arrow — bold and highly visible. Use it when you want to clearly highlight an important element or ensure the viewer’s attention is drawn immediately to a specific point.
3. Edge Arrow This arrow is more dynamic and is useful when pointing from the edges toward a specific element inside the image. It works well when you want to keep the main area uncluttered while still directing attention effectively.

Customizing Arrow Properties
Beyond just selecting an arrow type, Pixtel also allows you to customize how your arrows look and behave.
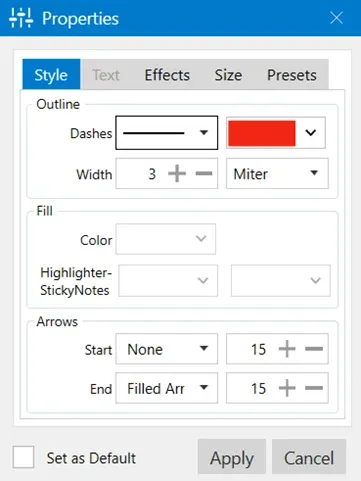
Once you place an arrow on the canvas, simply right-click on it and select Properties. This opens a settings panel where you can fine-tune your arrow.
Here are some of the key options available:
- Style: Adjust outline color, thickness (width), and line type (solid/dashed)
- Arrows: Customize the start and end arrowheads, including their size and shape
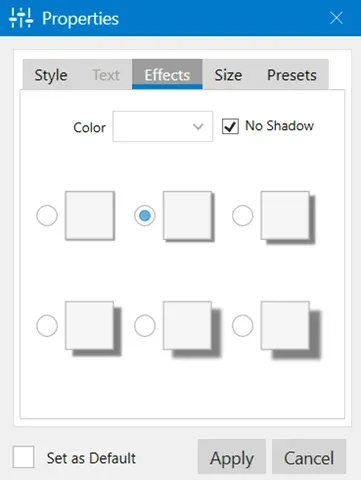
- Effects: Add or remove visual effects like shadows
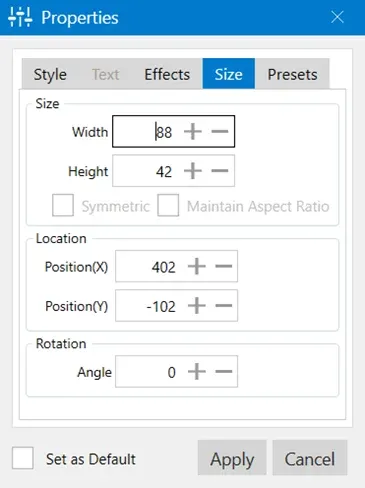
- Size & Position: Control the exact dimensions, placement, and even rotation of the arrow
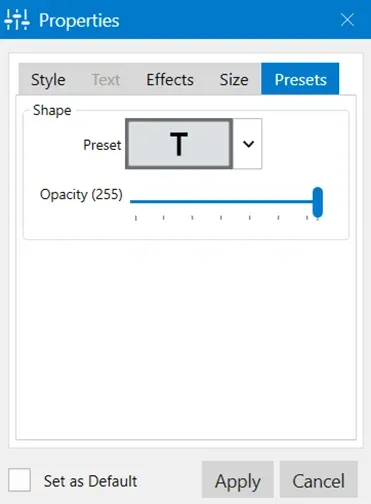
- Presets & Opacity: Apply predefined styles or adjust transparency for a softer look
These options give you full control, allowing you to match your arrows to the tone and clarity your explanation needs.
Pixtel makes visual communication simple and effective. With just a few steps — uploading or capturing a screenshot, switching to draw mode, and using the right arrow — you can create clear, guided visuals that are easy to understand. Small details like choosing the right arrow style can make a big difference in how your message is received. In the end, it’s not just about showing something — it’s about helping others see it clearly.
Related reading:
- Pixtel Callouts: Complete Guide →
- How to Annotate Images in Pixtel →
- Customizing Shape and Line Properties in Pixtel →
Capture once and use it forever. It isn’t just a tool — it’s Pixtel.
👉 Download Pixtel · 🎥 Follow us on YouTube · 📘 Read Detailed Documentation
'%3e%3cpath%20d='M6.49988%200.862305L0.380969%206.98121C-0.127315%207.4895%20-0.127315%208.31107%200.380969%208.81936C0.889253%209.32764%201.71083%209.32764%202.21911%208.81936L5.19992%205.83855V15.7C5.19992%2016.4176%205.781%2017%206.49988%2017C7.21875%2017%207.79984%2016.4176%207.79984%2015.7V5.83855L10.7806%208.81936C11.0341%209.07285%2011.3669%209.20024%2011.6997%209.20024C12.0325%209.20024%2012.3653%209.07285%2012.6188%208.81936C13.1271%208.31107%2013.1271%207.4895%2012.6188%206.98121L6.49988%200.862305Z'%20fill='white'/%3e%3c/g%3e%3cdefs%3e%3cclipPath%20id='clip0_1_2'%3e%3crect%20width='13.0002'%20height='16.8995'%20fill='white'%20transform='translate(-0.000244141%200.100533)'/%3e%3c/clipPath%3e%3c/defs%3e%3c/svg%3e)