

How to Place One Image Over Another Using the Embedded Image Option in Pixtel
When you take a screenshot, you may want to add one or more details on top of that image such as another screenshot or any image from your system. Instead of sharing multiple images, you can place everything on a single image. Using Pixtel, you can easily add one image over another and organize all the required details in one place.
Step 1: Capture or Import the Base Image
First, add the main image that will act as your base:
- Capture an image using Ctrl + Print Screen with Pixtel’s Region Captureor
- Import an existing image using the Import option
Step 2: Add Another Image Using Paste Shortcut
If you already have another image copied:
- Press Ctrl + V to paste the image
- The pasted image will appear on top of the base image
You can resize and move it to the required position.
Step 3: Embed an Image from Your System
If you want to add an image directly from your local directory:
- Switch to Draw Mode
- Select the Embedded Image option
- Choose the image from your system
- Drag and place it on top of the base image
Step 4: Add Multiple Images
- Repeat the same steps to add more images
- Place multiple images over a single screenshot
- Arrange them neatly to explain your content clearly
You can add as many images as needed on one canvas.
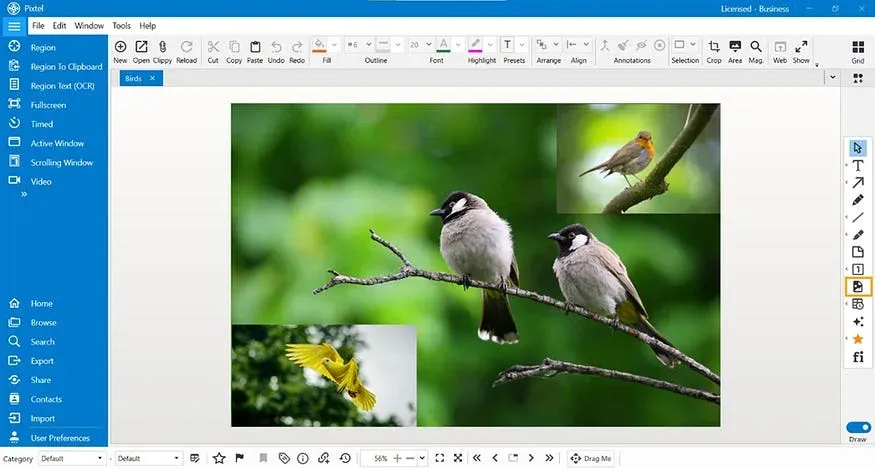
By placing multiple images on a single screenshot, you can organize information better and convey more details clearly. Instead of sending multiple images to the receiver, everything can be shown in one image, making it easier to understand and share. This approach helps create clear, structured visuals for presentations, explanations, and documentation.
Related reading:
- How to Annotate Images in Pixtel →
- Clip Art / Images in Pixtel: From Capture to Custom Sources →
- Create Stunning Image Layouts with Pixtel Collage & Collate →
Capture once and use it forever. It isn’t just a tool — it’s Pixtel.
👉 Download Pixtel · 🎥 Follow us on YouTube · 📘 Read Detailed Documentation
'%3e%3cpath%20d='M6.49988%200.862305L0.380969%206.98121C-0.127315%207.4895%20-0.127315%208.31107%200.380969%208.81936C0.889253%209.32764%201.71083%209.32764%202.21911%208.81936L5.19992%205.83855V15.7C5.19992%2016.4176%205.781%2017%206.49988%2017C7.21875%2017%207.79984%2016.4176%207.79984%2015.7V5.83855L10.7806%208.81936C11.0341%209.07285%2011.3669%209.20024%2011.6997%209.20024C12.0325%209.20024%2012.3653%209.07285%2012.6188%208.81936C13.1271%208.31107%2013.1271%207.4895%2012.6188%206.98121L6.49988%200.862305Z'%20fill='white'/%3e%3c/g%3e%3cdefs%3e%3cclipPath%20id='clip0_1_2'%3e%3crect%20width='13.0002'%20height='16.8995'%20fill='white'%20transform='translate(-0.000244141%200.100533)'/%3e%3c/clipPath%3e%3c/defs%3e%3c/svg%3e)