

How to Relocate Data in Pixtel
Many screenshot applications store captured images in a default location on your system. Over time, as screenshots accumulate, your drive can quickly run out of space. When that happens, relocating data often becomes a manual and frustrating task — copying files, updating paths, and worrying about missing images.
Managing screenshot storage shouldn’t be complicated.
This is where Pixtel makes the difference.
With Pixtel, there’s no need to struggle with manual file transfers or risky folder movements. If you want to switch your screenshot data from one drive to another, you can do it directly within the application — safely, securely, and in just a few clicks.
Follow these simple steps:
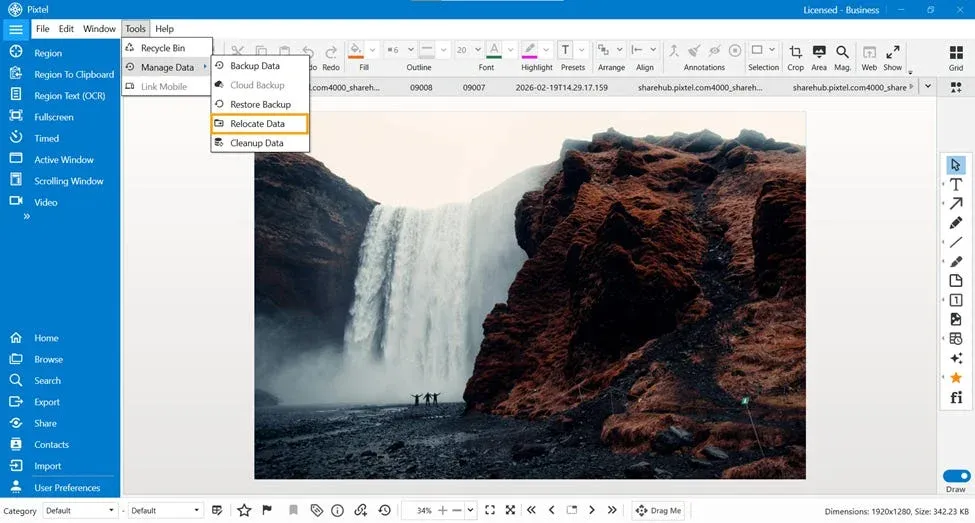
- Open Pixtel.
- Go to the Menu Bar.
- Click on Tools.
- Select Manage Data.
- Choose Relocate Data.
📊 What You Will See
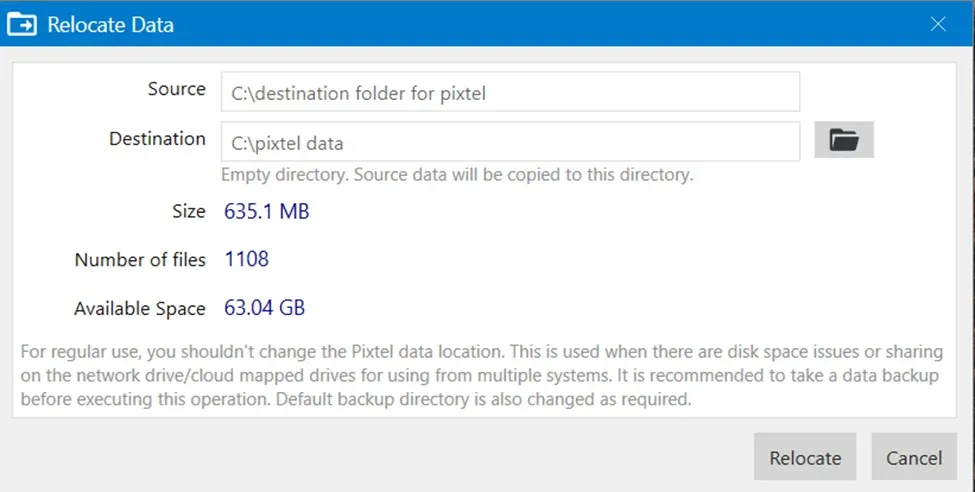
Once you open the Relocate Data window, it will display:
- 📁 Number of available files
- 💾 Total size of the files
- 🖥️ Available space in the selected destination drive
This helps you ensure the selected drive has enough space before proceeding.
📍 Select Destination and Relocate
- Choose your preferred destination directory.
- Verify available space.
- Click on Relocate.
Pixtel will automatically relocate all your data to the selected directory. You don’t need to perform any manual operations.
✅ After Relocation
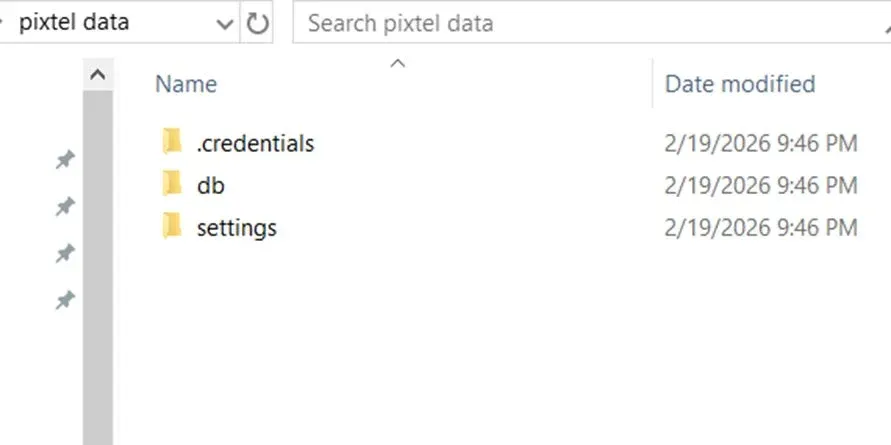
- All files will be moved to the new destination.
- Folder structure will remain intact.
- Pixtel will start using the new location as the default storage path.
Relocating data in Pixtel is quick, safe, and user-friendly. Whether your disk is full or you simply want to change the storage location, the Relocate Data feature makes the process effortless.
Move your data with confidence using Pixtel. 🚀
Related reading:
- Secure Your Data with Easy Backup in Pixtel →
- Restore Deleted Media Easily with the Pixtel Recycle Option →
- How to Manage Data in Pixtel: Backup, Restore, Relocate & Clean Up →
Capture once and use it forever. It isn’t just a tool — it’s Pixtel.
👉 Download Pixtel · 🎥 Follow us on YouTube · 📘 Read Detailed Documentation
'%3e%3cpath%20d='M6.49988%200.862305L0.380969%206.98121C-0.127315%207.4895%20-0.127315%208.31107%200.380969%208.81936C0.889253%209.32764%201.71083%209.32764%202.21911%208.81936L5.19992%205.83855V15.7C5.19992%2016.4176%205.781%2017%206.49988%2017C7.21875%2017%207.79984%2016.4176%207.79984%2015.7V5.83855L10.7806%208.81936C11.0341%209.07285%2011.3669%209.20024%2011.6997%209.20024C12.0325%209.20024%2012.3653%209.07285%2012.6188%208.81936C13.1271%208.31107%2013.1271%207.4895%2012.6188%206.98121L6.49988%200.862305Z'%20fill='white'/%3e%3c/g%3e%3cdefs%3e%3cclipPath%20id='clip0_1_2'%3e%3crect%20width='13.0002'%20height='16.8995'%20fill='white'%20transform='translate(-0.000244141%200.100533)'/%3e%3c/clipPath%3e%3c/defs%3e%3c/svg%3e)