

Email Integration in Pixtel - Complete Guide (Step-by-Step Order)
Pixtel’s Email feature allows you to send screenshots, edited images, and documents directly from the application. It supports multiple providers, smart contact suggestions, nickname mapping, and customizable templates — making communication faster and more professional.
Let’s go in the correct order.
Share Captured Images Instantly via Email in Pixtel
If you want to share captured images using Pixtel, the process is very simple and quick.
You can either:
- 📸 Capture images directly using Pixtel’s screenshot toolsOR
- 📂 Import images from your local system into Pixtel
Once the image opens in a new Pixtel tab, you can edit, annotate, or apply effects if needed.
Sending Images via Email
After your image is ready:
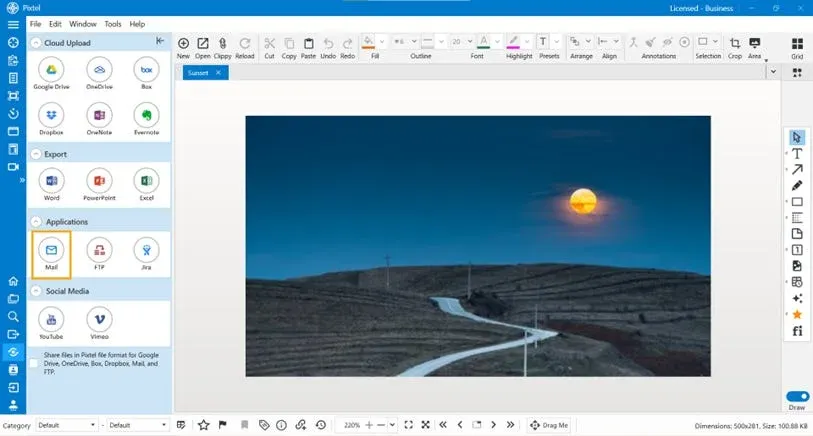
- From the Home BarselectShare Option
- Under Applications Click on the Email option
- The Email Sender window will open
Email Providers (Email Types Supported)
Before sending emails, you need to configure an account.Pixtel supports multiple providers, including:
- Office365
- Outlook
- Yahoo
- Zoho
- iCloud
- Hotmail/MSN
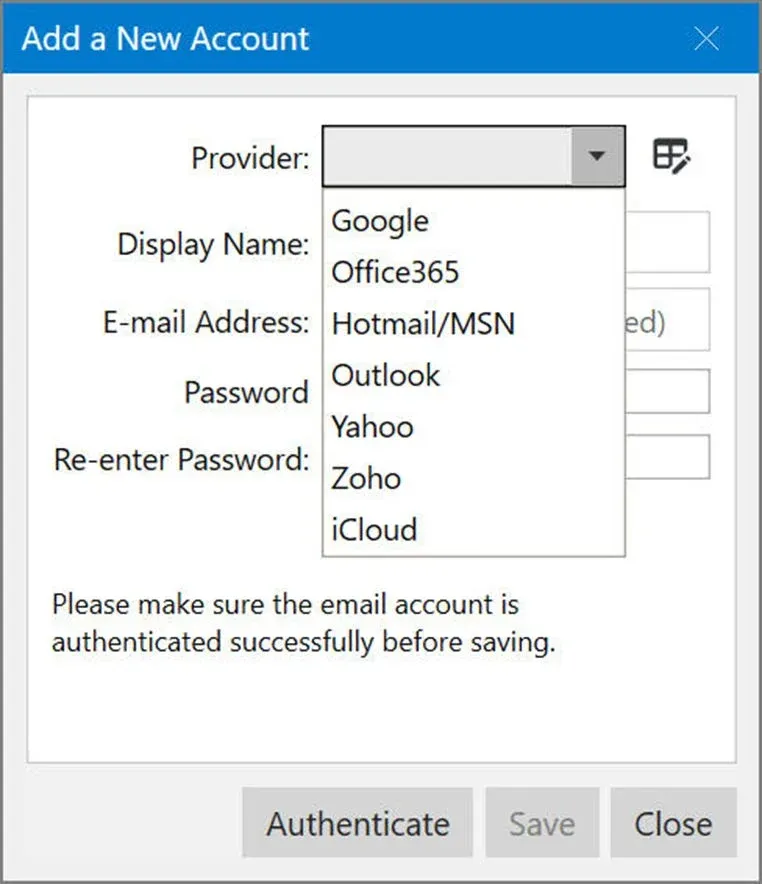
When adding an account, you select your provider from the dropdown list.
For OAuth2-supported providers like Google and Office365:
- Authentication opens in a secure browser window
- 2-step verification is supported
Once authentication is successful, click Save to store the account.
Adding a New Email Account
When you click Add in the Email Sender window:
A new window opens where you must:
- Select Provider
- Enter Display Name
- Enter Email Address
- Enter Password
- Click Authenticate (to validate credentials)
- Click Save
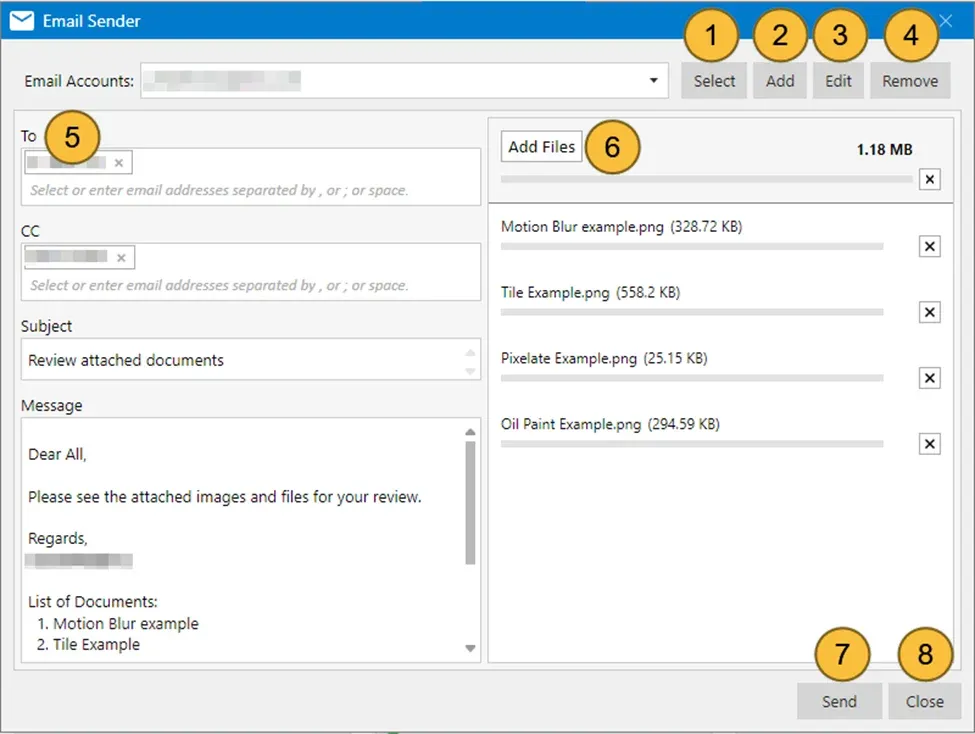
You can later use:
- Edit to modify account details
- Remove to delete a saved account
- Select to activate a saved account
Email Sender Fields
Once an account is selected, you can compose your email.
🔹 To
Enter primary recipient email addresses.
🔹 Cc
Add additional recipients if required.
You can:
- Manually type email addresses
- Select from dropdown suggestions
Subject & Default Template Message
Pixtel automatically generates:
- A default Subject
- A professional Message body
- A list of attached images/files
This is very helpful for teams who regularly share screenshots and reports.
Add Files Option
Click Add Files to:
- Attach additional files from your system
- Attach documents (PDF, Word, Excel, etc.)
- Combine images and non-image files
Attachments are not restricted to images only.
Sending the Email
After filling:
- To
- Cc
- Subject
- Message
- Attachments
Click Send.
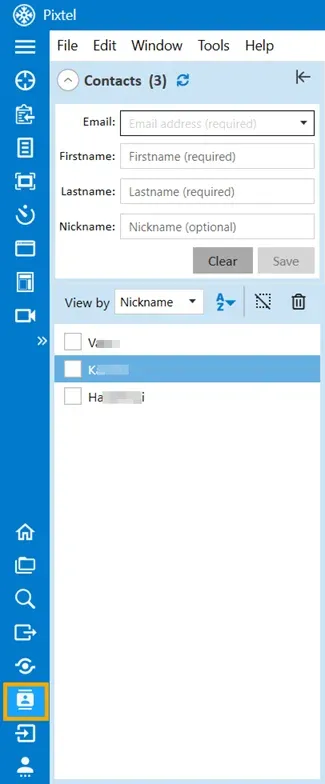
Smart Contact Suggestions & Nickname Support
✔ When you send an email to a recipient for the first time, Pixtel automatically saves that contact.
✔ From next time onwards, as you start typing, Pixtel suggests that email address in the dropdown.
✔ You can also assign a nickname to an email address.
Example:If you assign nickname “QA”, whenever you type “QA”, the full email address will automatically populate.
This saves time and reduces typing errors.
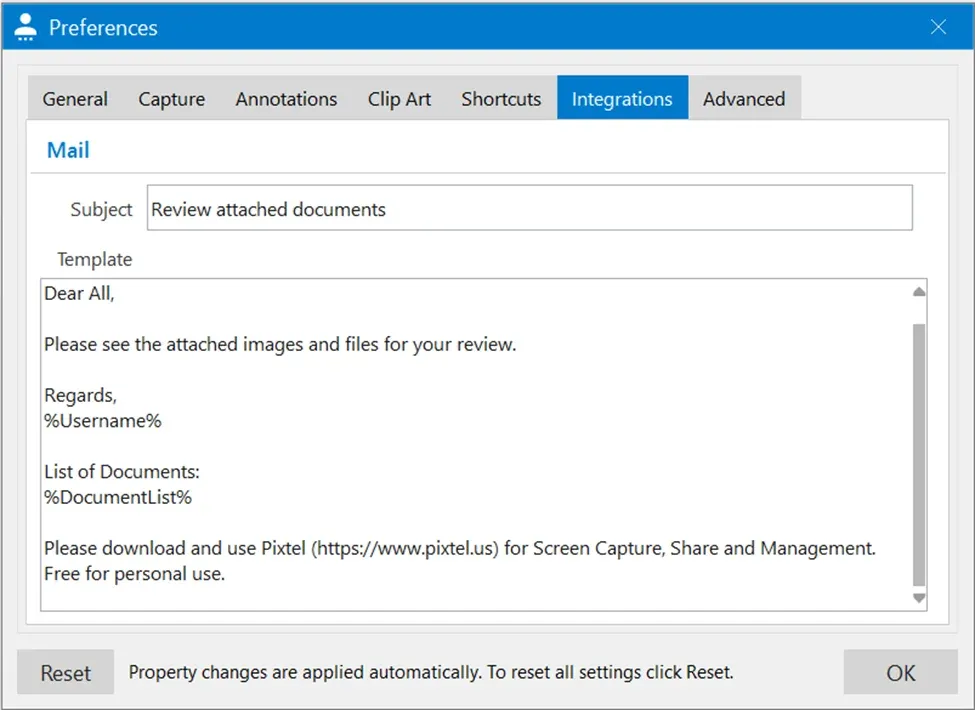
Customizing Email Templates
You can modify the default email content anytime.
Go to:
User Preferences → Integrations
Here you can:
- Update subject format
- Edit default message text
- Customize how attachment lists appear
This ensures your emails follow your organization’s standard format.
Pixtel’s Email Integration provides a structured, secure, and intelligent way to send files. From multiple provider support and OAuth2 authentication to smart contact suggestions, nickname-based auto-fill, and customizable templates — everything is designed to improve productivity.
Instead of switching between tools, you can capture, edit, attach, and send — all from one place.
Related reading:
- Jira Integration with Pixtel: Attach Screenshots Directly to Issues →
- How to Share Captures Effortlessly with Pixtel →
- How to Share Images Using Share Link in Pixtel →
Capture once and use it forever. It isn’t just a tool — it’s Pixtel.
👉 Download Pixtel · 🎥 Follow us on YouTube · 📘 Read Detailed Documentation
'%3e%3cpath%20d='M6.49988%200.862305L0.380969%206.98121C-0.127315%207.4895%20-0.127315%208.31107%200.380969%208.81936C0.889253%209.32764%201.71083%209.32764%202.21911%208.81936L5.19992%205.83855V15.7C5.19992%2016.4176%205.781%2017%206.49988%2017C7.21875%2017%207.79984%2016.4176%207.79984%2015.7V5.83855L10.7806%208.81936C11.0341%209.07285%2011.3669%209.20024%2011.6997%209.20024C12.0325%209.20024%2012.3653%209.07285%2012.6188%208.81936C13.1271%208.31107%2013.1271%207.4895%2012.6188%206.98121L6.49988%200.862305Z'%20fill='white'/%3e%3c/g%3e%3cdefs%3e%3cclipPath%20id='clip0_1_2'%3e%3crect%20width='13.0002'%20height='16.8995'%20fill='white'%20transform='translate(-0.000244141%200.100533)'/%3e%3c/clipPath%3e%3c/defs%3e%3c/svg%3e)