

Customizing Shape and Line Properties in Pixtel
Explaining something visually often achieves what paragraphs of text cannot. A simple mark, a clear boundary, or a well-placed line can guide attention instantly and remove confusion. Whether you are creating documentation, reporting an issue, or walking someone through a feature, clarity becomes effortless when visuals do the talking.
This is where Pixtel proves especially useful. Its drawing tools are designed to be simple, yet precise, allowing you to turn any screenshot into a structured and meaningful explanation. From straight lines to freehand shapes, each tool helps you communicate intent without overcomplicating the process.
Uploading a Screenshot and Getting Started
To begin, you need an image to work with. Pixtel gives you flexible options:
- You can capture a screenshot directly using Pixtel
- Or upload an existing image using the available import options
Once your screenshot is selected, it opens in a new Pixtel tab, giving you a dedicated space to edit and annotate.
From here, switch to Draw Mode. This is where all the annotation tools become available. By toggling into draw mode, you unlock options to mark, highlight, and guide attention within your image.
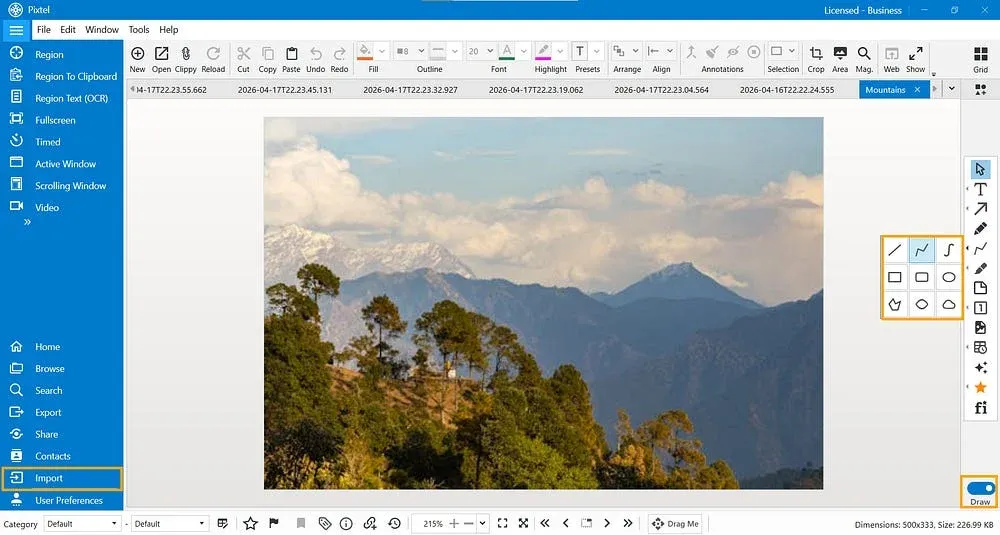
Understanding the Drawing Tools
Pixtel provides a range of drawing tools, each suited for a different type of visual explanation. Knowing when to use which tool makes your annotations clearer and more effective.
Line Tool
The Line tool is the simplest and most precise option. It allows you to draw a single straight line between two points. When you hold the Shift key, the line automatically aligns either horizontally or vertically, helping you create perfectly straight guides.
This is particularly useful for underlining, separating sections, or pointing in a clean and minimal way.
Lines (Multi-Point Tool)
This tool allows you to draw multiple connected straight lines by placing points one after another. It is ideal for creating structured paths or outlining shapes using straight edges.

When you enter edit mode, each point becomes adjustable. These points are highlighted, allowing you to refine the shape even after drawing. This flexibility makes it suitable for diagrams or step-by-step visual flows.
Lines with Interpolation
Unlike the standard multi-line tool, this option creates smooth curves between points instead of sharp angles. The result is a flowing, natural-looking line.
This is helpful when you want to highlight curved paths or create annotations that feel less rigid and more visually appealing.
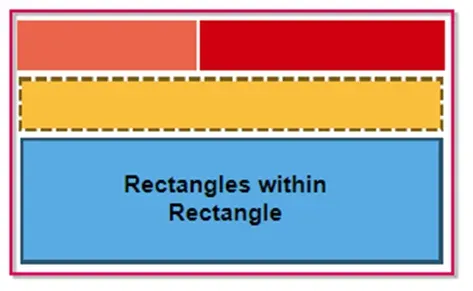
Rectangle
The Rectangle tool is commonly used to frame important areas. It creates a box with sharp edges, making it perfect for highlighting sections of a UI or specific content within an image.
Holding the Shift key ensures the shape becomes a perfect square, which is useful when consistency matters.
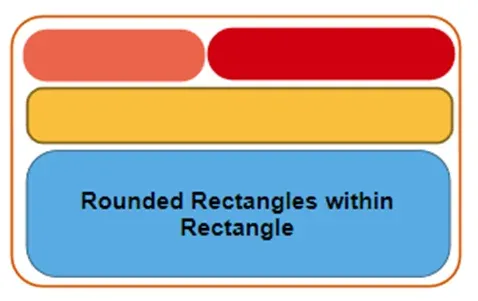
Rounded Rectangle
This works similarly to the standard rectangle but with softer, rounded edges. It provides a more modern and subtle visual style.
Like the rectangle tool, holding Shift constrains it into a square shape. This tool is often preferred when you want highlights to feel less harsh.
Ellipse
The Ellipse tool allows you to draw oval shapes, which are great for circling elements. By holding the Shift key, you can create a perfect circle.
This is especially useful for drawing attention to icons, buttons, or specific focal points in a screenshot.

Polygon
The Polygon tool lets you create a closed shape by connecting multiple points with straight lines. It fills the area inside the shape, making it effective for highlighting irregular regions.
This is useful when rectangles or circles are not enough to cover the exact area you want to emphasize.

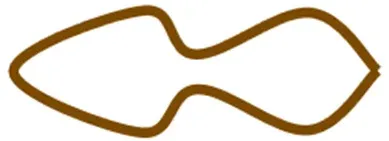
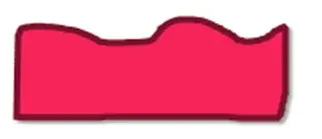
Polygon with Interpolation
This is a smoother version of the polygon tool. Instead of sharp edges, it creates curved boundaries between points, resulting in a softer and more natural shape.
It works well when highlighting areas that do not follow strict geometric patterns.

Freehand Polygon
For complete flexibility, the Freehand Polygon tool allows you to draw shapes freely without placing fixed points. This makes it fast and intuitive.
If the smart pencil feature is enabled, Pixtel can automatically adjust your drawing to match a recognizable geometric shape. This helps combine speed with accuracy.
Customizing Line Properties
Beyond just selecting an arrow type, Pixtel also allows you to customize how your arrows look and behave.
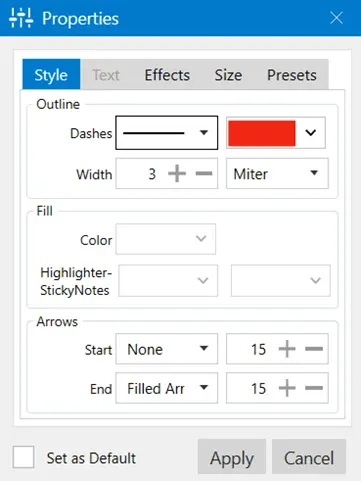
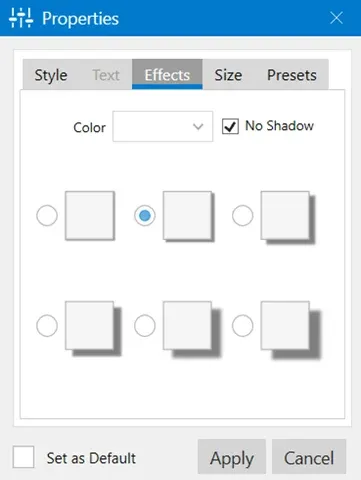
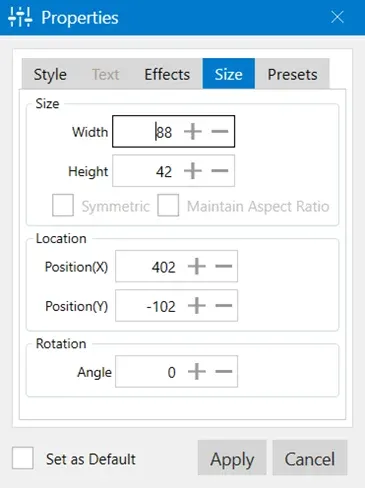

Once you place an arrow on the canvas, simply right-click on it and select Properties. This opens a settings panel where you can fine-tune your arrow.
Here are some of the key options available:
Pixtel’s drawing tools are designed to make visual communication simple and effective. Whether you need precise lines, structured shapes, or freehand flexibility, each tool plays a specific role in helping you explain things clearly.
By choosing the right tool for the right situation, you can transform any screenshot into a well-guided visual story — one that is easy to understand at a glance and far more impactful than words alone.
Related reading:
- Clear Visual Communication with Pixtel Arrows →
- Pixtel Callouts: Complete Guide →
- How to Annotate Images in Pixtel →
Capture once and use it forever. It isn’t just a tool — it’s Pixtel.
👉 Download Pixtel · 🎥 Follow us on YouTube · 📘 Read Detailed Documentation
'%3e%3cpath%20d='M6.49988%200.862305L0.380969%206.98121C-0.127315%207.4895%20-0.127315%208.31107%200.380969%208.81936C0.889253%209.32764%201.71083%209.32764%202.21911%208.81936L5.19992%205.83855V15.7C5.19992%2016.4176%205.781%2017%206.49988%2017C7.21875%2017%207.79984%2016.4176%207.79984%2015.7V5.83855L10.7806%208.81936C11.0341%209.07285%2011.3669%209.20024%2011.6997%209.20024C12.0325%209.20024%2012.3653%209.07285%2012.6188%208.81936C13.1271%208.31107%2013.1271%207.4895%2012.6188%206.98121L6.49988%200.862305Z'%20fill='white'/%3e%3c/g%3e%3cdefs%3e%3cclipPath%20id='clip0_1_2'%3e%3crect%20width='13.0002'%20height='16.8995'%20fill='white'%20transform='translate(-0.000244141%200.100533)'/%3e%3c/clipPath%3e%3c/defs%3e%3c/svg%3e)