

Find Any Screenshot by the Text in It with Pixtel
You Remember What It Said, Not What You Called It
You took the screenshot weeks ago. You remember the error message, the invoice number or the name on the page. But the file is called Capture 2026-10-14 093112, and it sits among hundreds of others. Scrolling through thumbnails is the only way to find it.
Pixtel now reads the text in your pictures, so you can search for what a picture shows. Type a word in the Search panel and Pixtel finds every picture with that word in it. Open one and press Ctrl+F: Pixtel shows each place the word appears, like Find in a web browser.
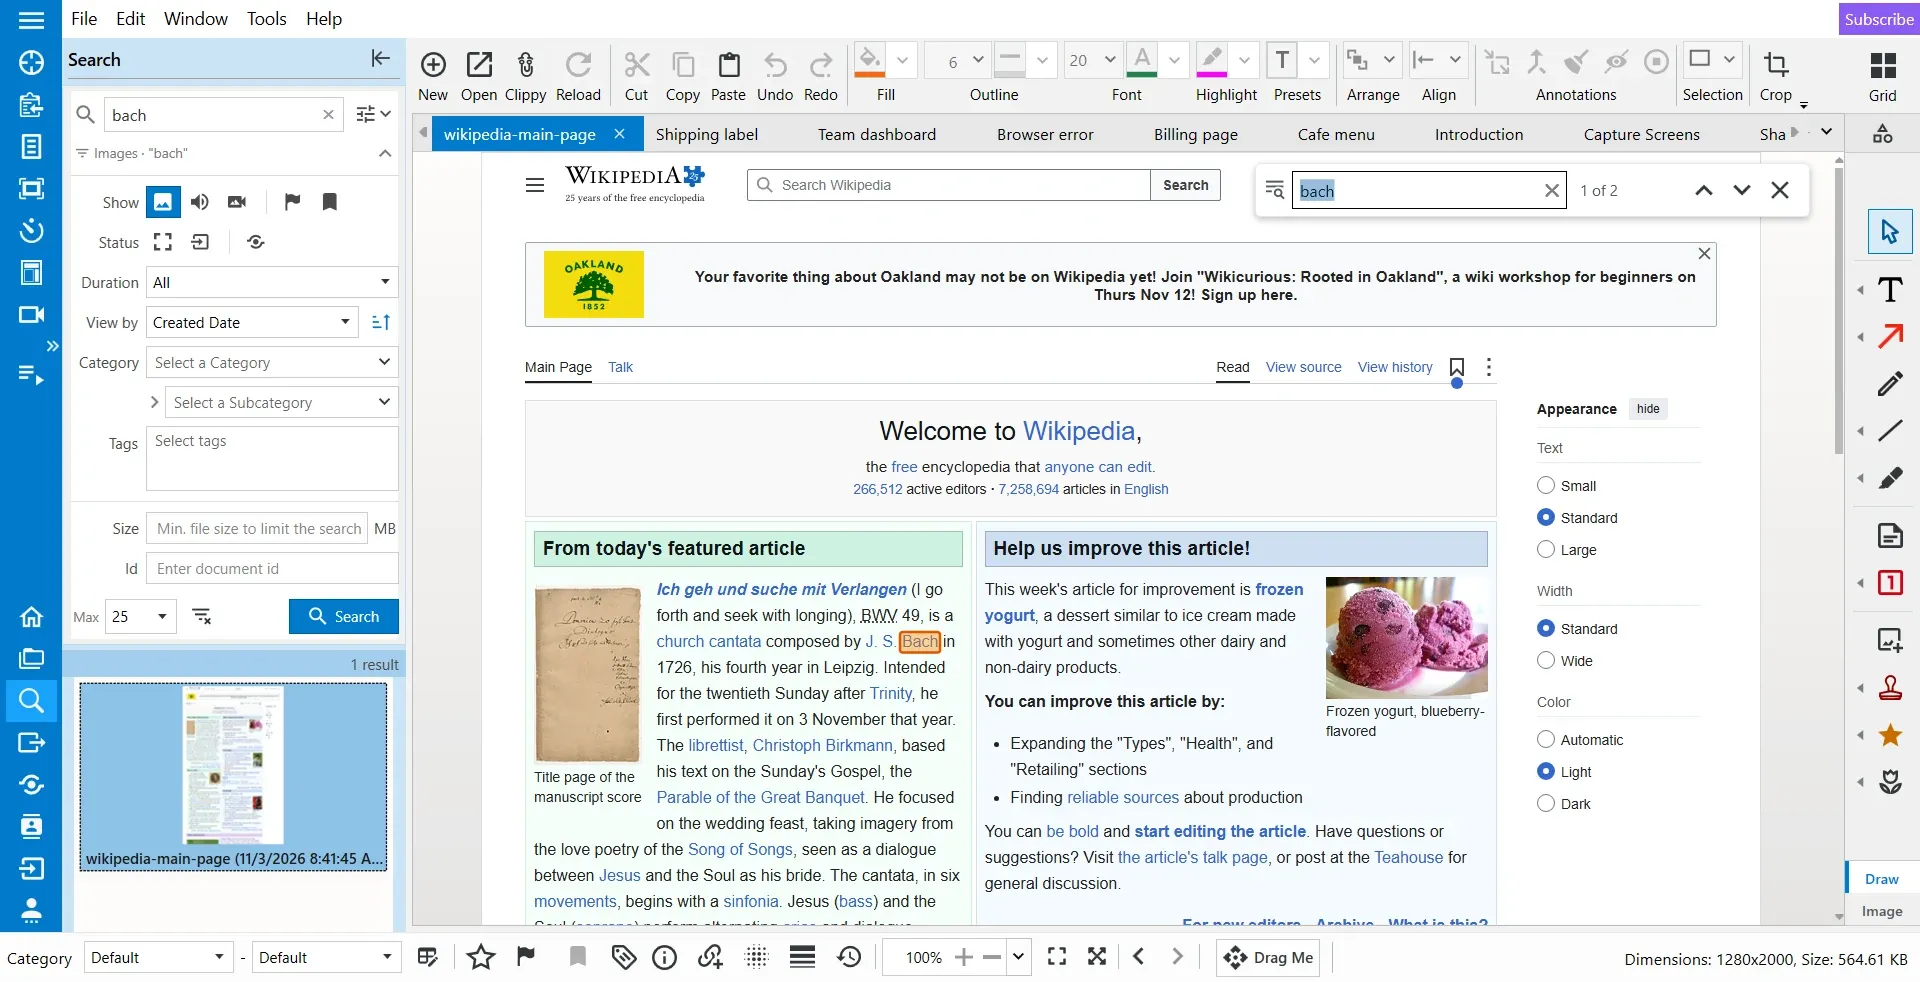
The screenshots in this post show Wikipedia's Main Page, captured into Pixtel.
Why It Helps
- Find a picture by what it says. Error messages, order numbers, names, prices, headlines: if it is written in the picture, you can search for it.
- No naming or tagging needed. Pixtel reads every picture in your library in the background. Pictures you already have are read too.
- Jump to the right spot. In a long, scrolling capture, Ctrl+F takes you straight to each place the word appears.
- It stays on your PC. The text is read with Windows' built-in text recognition. Nothing is uploaded, and the text is kept with your library on this computer.
- Private parts stay private. Text under a Blur or Pixelate annotation is never read, so it can't be found.
Turn It On
Reading text in images is on by default. To check it, or to see how far Pixtel has got:
- Open Window → User Preferences and choose the Capture tab.
- Scroll down to Text Extraction (OCR).
- Search text in images turns the reading on or off. Next to it, Pixtel shows how many of your images it has read so far.
- Read again forgets the text read so far and reads every image again, for example after you change the OCR Language.
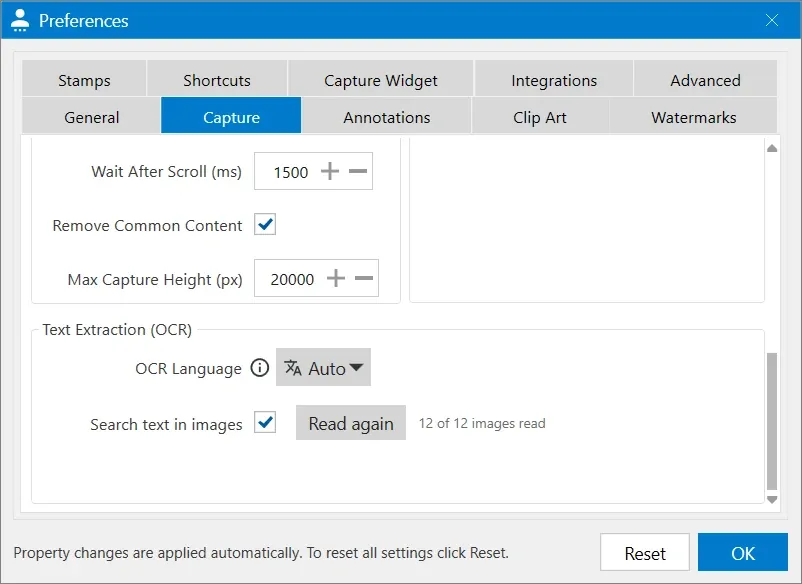
Pixtel reads in the background: shortly after it starts, every few minutes after that, and again whenever a picture changes. You can keep working while it reads.
Pixtel uses the text recognition languages installed in Windows. If none is installed, Pixtel says so; add one in Windows Settings → Time & language → Language & region.
Search Your Library by the Text in Pictures
Step 1: Open the Search panel
- Click Search on the left bar.
Step 2: Type what you remember
- Type one or more words in the search box and press Enter.
- Every word must be found, though not necessarily together. Put a phrase in quotes, such as
"order shipped", to find those words side by side. - Case and accents don't matter, and part of a word is enough: voice finds Invoice.
Step 3: See why a picture was found
- Hover over a result. The tooltip shows the line of the picture that matched, under In the image.
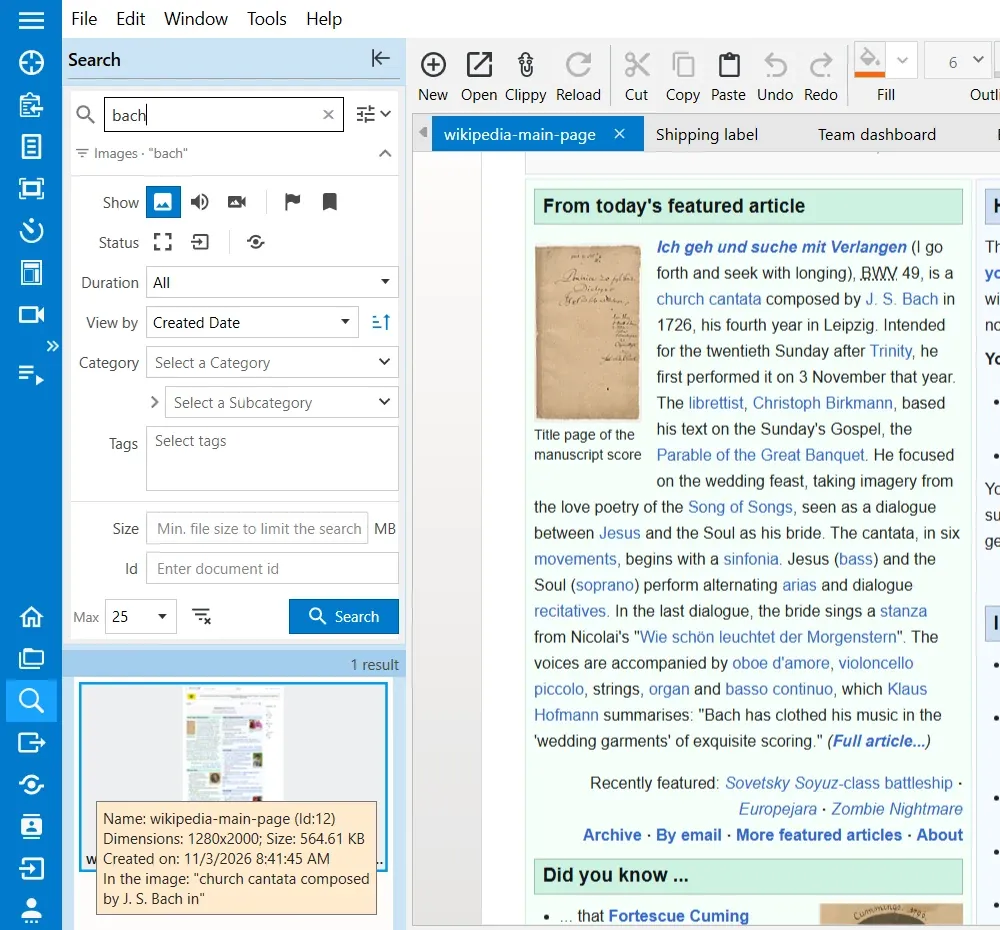
Step 4: Put the best match first (optional)
- Set View by to Relevance. Pictures whose name matches come first, then the pictures where the text matches best.
If Pixtel hasn't finished reading your library, the results say how many images are not read yet, and Pixtel reads them straight away rather than at its next pass.
Choose Where to Look
By default, the search box looks in three places at once: picture names, descriptions, and the text in images. To narrow it down, click Look in, the button beside the search box, and tick only the places you want. The list stays open while you tick.
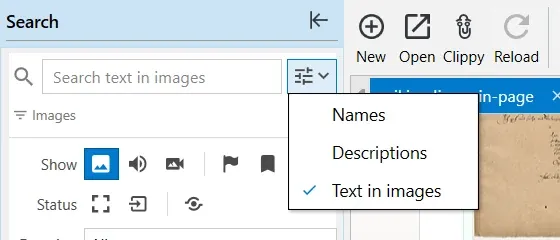
- The empty search box tells you where it will look, for example Search text in images or Search names and descriptions.
- While it looks in fewer than all three places, Look in turns blue, so a narrowed search never goes unnoticed. Hover over it to see the places it looks in.
- At least one place always stays ticked.
Find Every Place a Word Appears: Ctrl+F
Found the picture? Now find the word in it.
Step 1: Open the find bar
- In the editor, press Ctrl+F, or choose Edit → Find Text in Picture.
- If you opened the picture from a search result, the find bar opens by itself with the words you searched for.
Step 2: Type a word
- Pixtel draws a box around every place the word appears and outlines the current one. The bar counts them: 1 of 2.
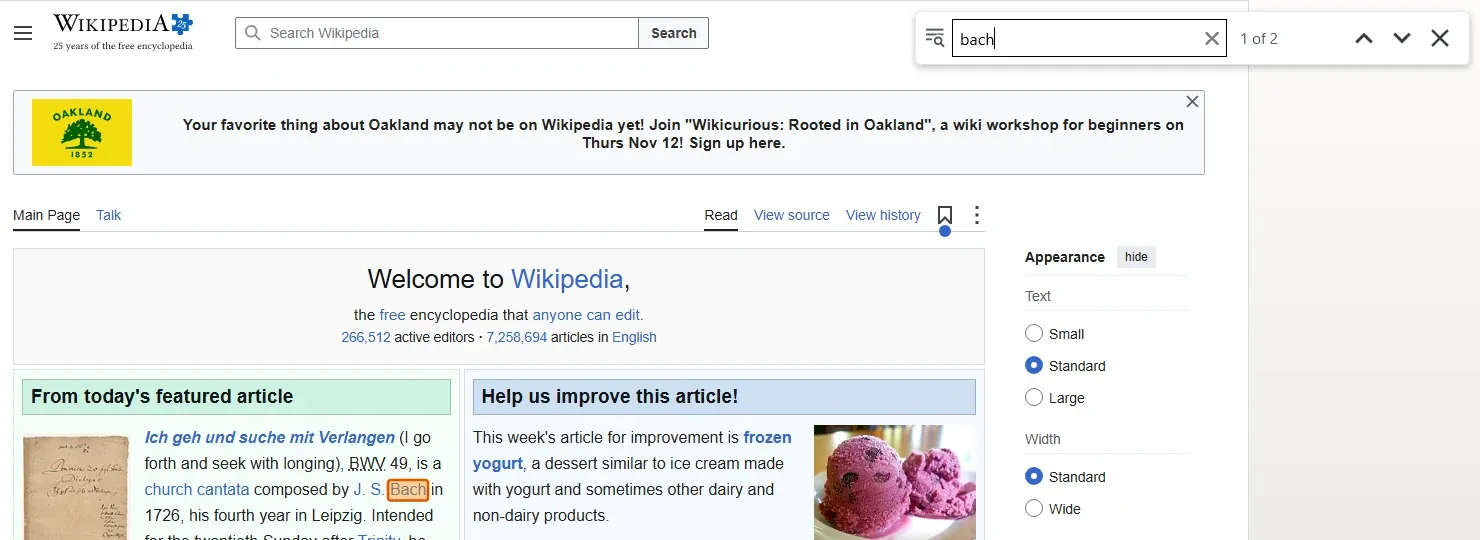
Step 3: Move between them
- Enter or the down arrow goes to the next place; Shift+Enter or the up arrow goes back. Pixtel scrolls each one into view, and past the last place it goes round to the first.
- Esc closes the bar.
The boxes are only drawn on screen. They are never added to the picture, so nothing changes when you save, copy or export it.
Good to know
- A picture Pixtel hasn't read yet is read when you search it. The bar shows Reading the text… for a moment.
- If you've edited a picture since it was read, the bar says so. Save it, then press Enter to search the new version.
How Teams Use It
- Support and QA. Find the screenshot of an error by the error message itself, then jump to the line that matters before attaching it to a ticket.
- Finance and operations. Search receipts, invoices and order confirmations by number, vendor or amount.
- Product and project managers. Find the screen where a feature, a label or a customer name appeared, across months of sprint reviews and demos.
- Research and writing. Search captured articles and long scrolling web pages for a name or a quote, then step through each mention.
- Training and documentation. Find every capture that shows a menu item or setting by its name when the product changes.
Tips
- Capture long pages with Scrolling Capture, then use Ctrl+F to move through them instead of scrolling.
- Combine text with other filters: tick Flagged or pick a Category in the Search panel to search a smaller set.
- Hide private details with Blur or Pixelate before Pixtel reads the picture: that text is never stored or found.
- To copy text out of a picture rather than find it, use Extract Text From Region (OCR).
✨ Capture once. Use it forever. It isn't just a tool—it's Pixtel.
🎯 Try Pixtel today and find any screenshot by what it says.
Call-to-Action
Download Pixtel · Read Detailed Documentation
Related reading:
